
Dyson Milwaukee Battery Adapter
Recently I bought a (very) used Dyson DC16 handheld vacuum on Ebay for my office. I got a great deal on the vacuum because it came without a charger and needed some new seals and filters. I thought I would be able to use one of the other Dyson chargers we have kicking around the house, but alas it looks like nearly every Dyson line has a unique (if very similar looking) charger. In the case of the DC16, it annoyingly doesn’t have a DC barrel jack, but uses a charging cradle that interfaces to two contacts on the bottom of the vacuum.
I thought about buying a charger from Ebay or elsewhere, but they’re not super easy to come by and also end up costing nearly as much as I paid for the vacuum (which explains why I got such a good deal on the vacuum). I toyed around with 3D printing a new charge cradle, and even found someone who had designed a cradle. I printed this off, but found that it fit the vacuum very poorly and I struggled to find anything around my office to make into suitable charge contacts.
Additionally, the capacity of the battery was starting to reach end of life so it started to look like I should get a new battery as well. I hobbled along for a few months charging the vacuum from a bench power supply with leads clipped to the charge contacts, but I knew I would need to find a better approach.
Adapting a Milwaukee Battery to the Dyson
At this point I decided the best approach would be to just replace the Dyson battery with a Milwaukee M18 battery since I already have a lot of those around my office for various power tools. This reduces the number of chargers I have cluttering the office as well as saves me buying a new battery and charger. I found several folks who had successfully done this using various power tool batteries:
- VITOR_FR has a 3D model for paid download on Cults3D
- u/wuice over on Reddit showed his solution using the husk of the old Dyson battery
- Yanev has a 3D model on Printables for a Dewalt battery that looks exactly like what I’m after
I didn’t want to pay for a 3D model and I wanted a cleaner solution than the hollowed-out Dyson battery, so I decided to go with something similar to what Yanev designed.
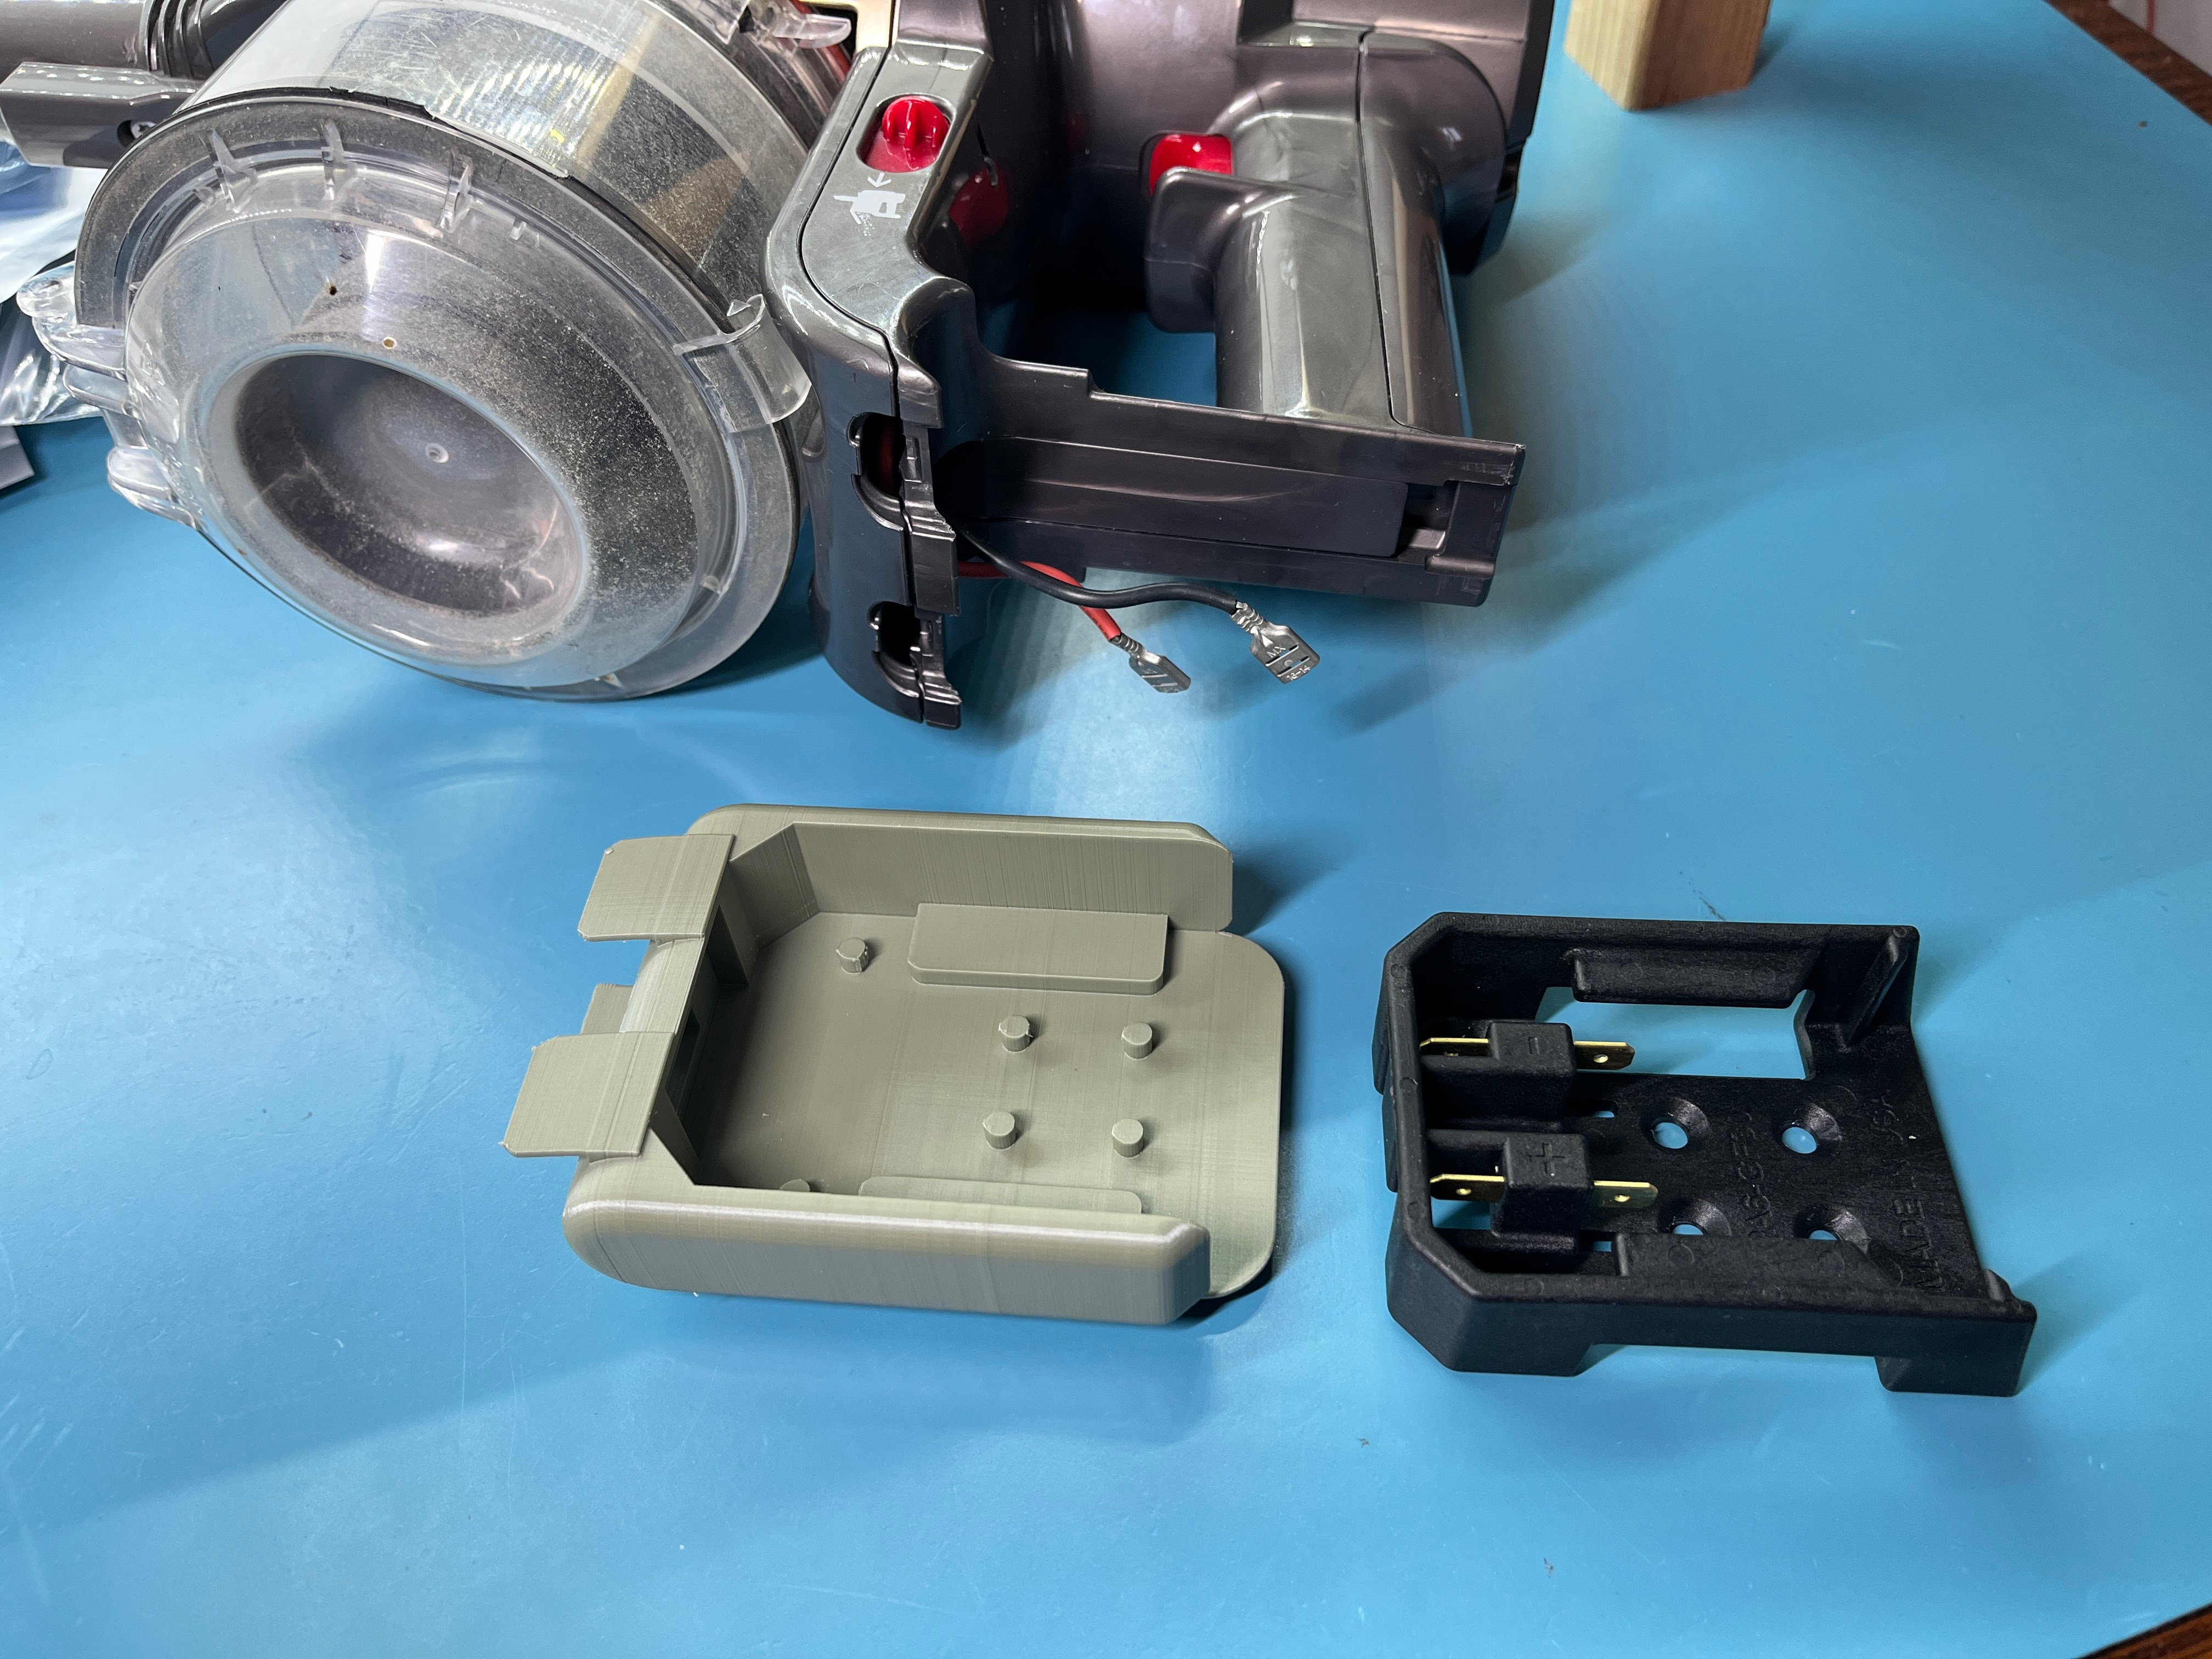
I departed from their design a bit by deciding to purchase an injection molded Milwaukee battery cradle instead of 3D printing my own. I have a shop light that uses the Milwaukee batteries and has a 3D printed cradle and I find that the rough surface finish and imprecise tolerances cause the batteries to be tough to mate and de-mate from the light, so I figured going with an injection molded part would help smooth this out.
Vacuum Modifications
I initially thought I would keep the vacuum cleaner un-modified and make this a purely drop-in replacement for the Dyson battery, but later decided against it. The Dyson battery has 6 cells vs. 5 cells for the Milwaukee battery, so I’d either need to integrate a boost converter on the 5 cell battery’s output or deal with only being able to use the Milwaukee battery when it is nearly fully charged before hitting the low voltage cutoff of the vacuum. Getting a boost converter that is reasonably small and cheap and can handle the full current draw of the vacuum (>10A at full power) looked difficult, and the short battery life from using only the top range of the battery’s capacity would be annoying.
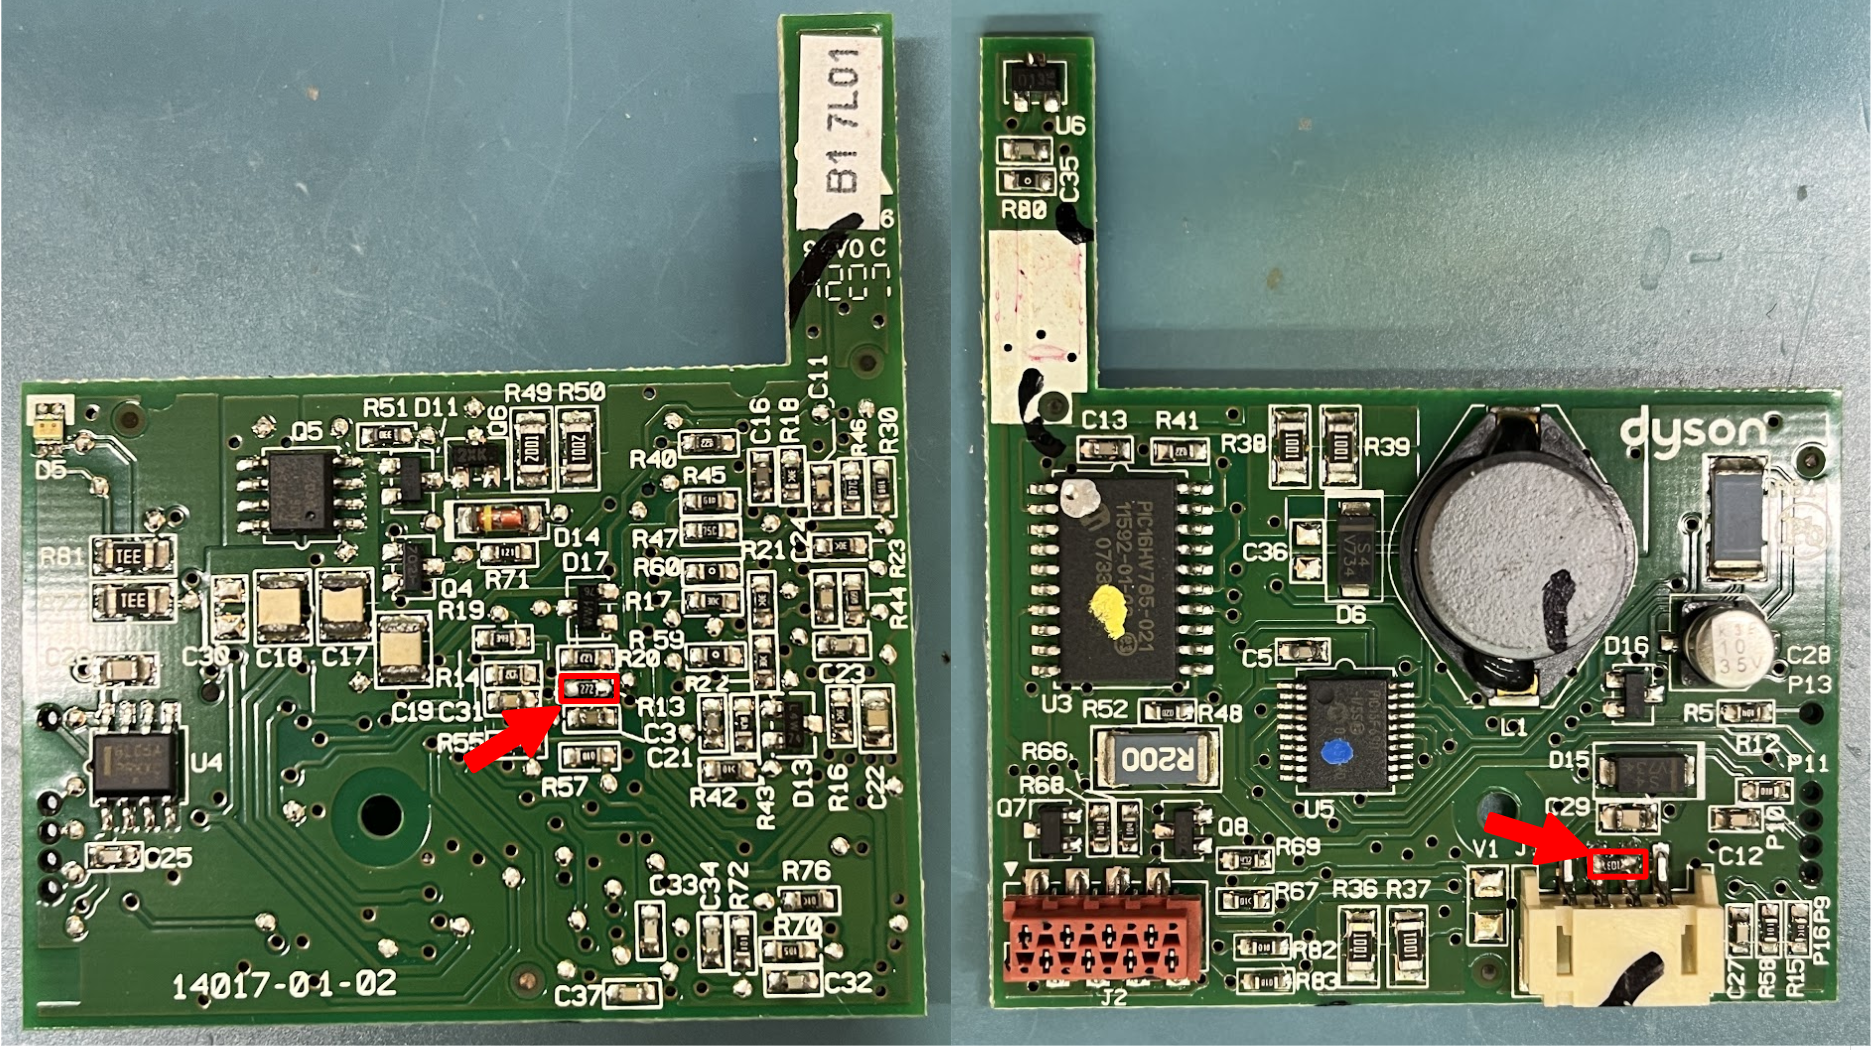
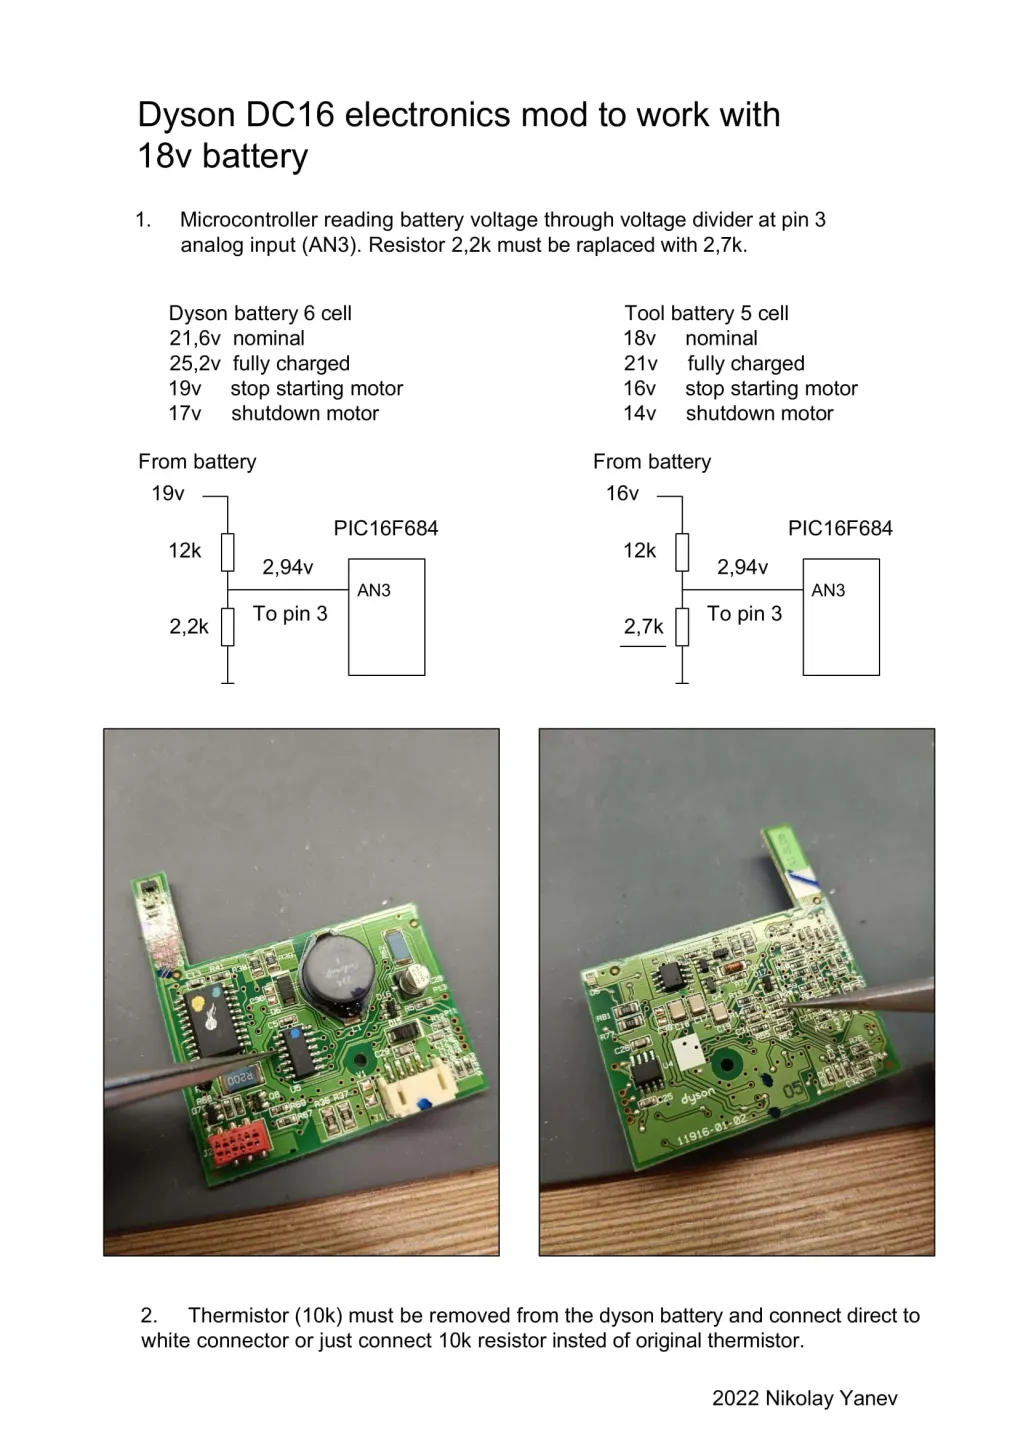
Conveniently, our friend Yanev reverse engineered the DC16’s control board and found the voltage divider used for measuring the battery voltage. Swapping a 2.7kΩ resistor in for the 2.2kΩ on the bottom of the divider gives us a 14V cutoff voltage which gives a healthy 2.8V/cell cutoff for the Milwaukee battery. Pulling the control board was pretty easy:
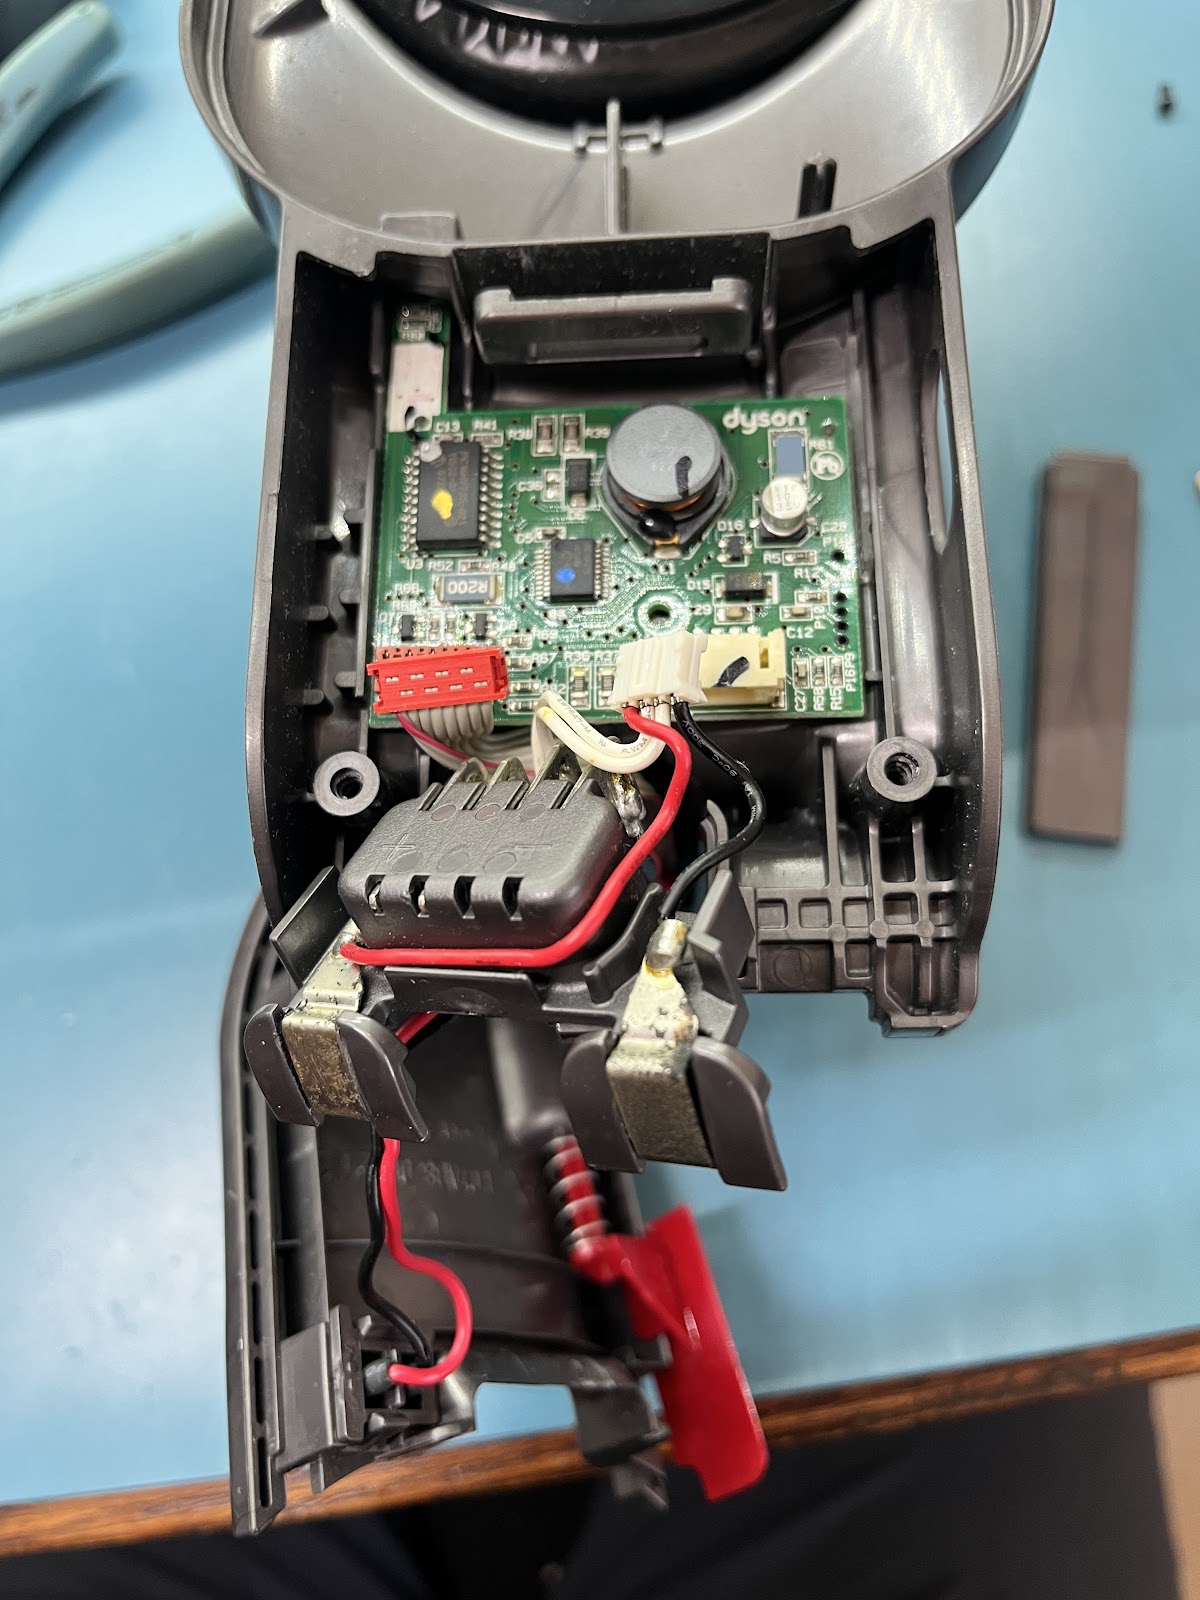
And then swapping R13 on the bottom of the board to a 2.7kΩ 0603 resistor was also super easy. While I was in there, I also soldered a 10kΩ resistor across the pins of the connector that previously connected to the Dyson battery’s 10k NTC thermistor. In the future I’d like to actually wire in the Milwaukee battery’s thermistor, but the injection molded cradle I bought doesn’t include the thermistor contacts so for now I’m just disabling the thermal cutoff features with this resistor.
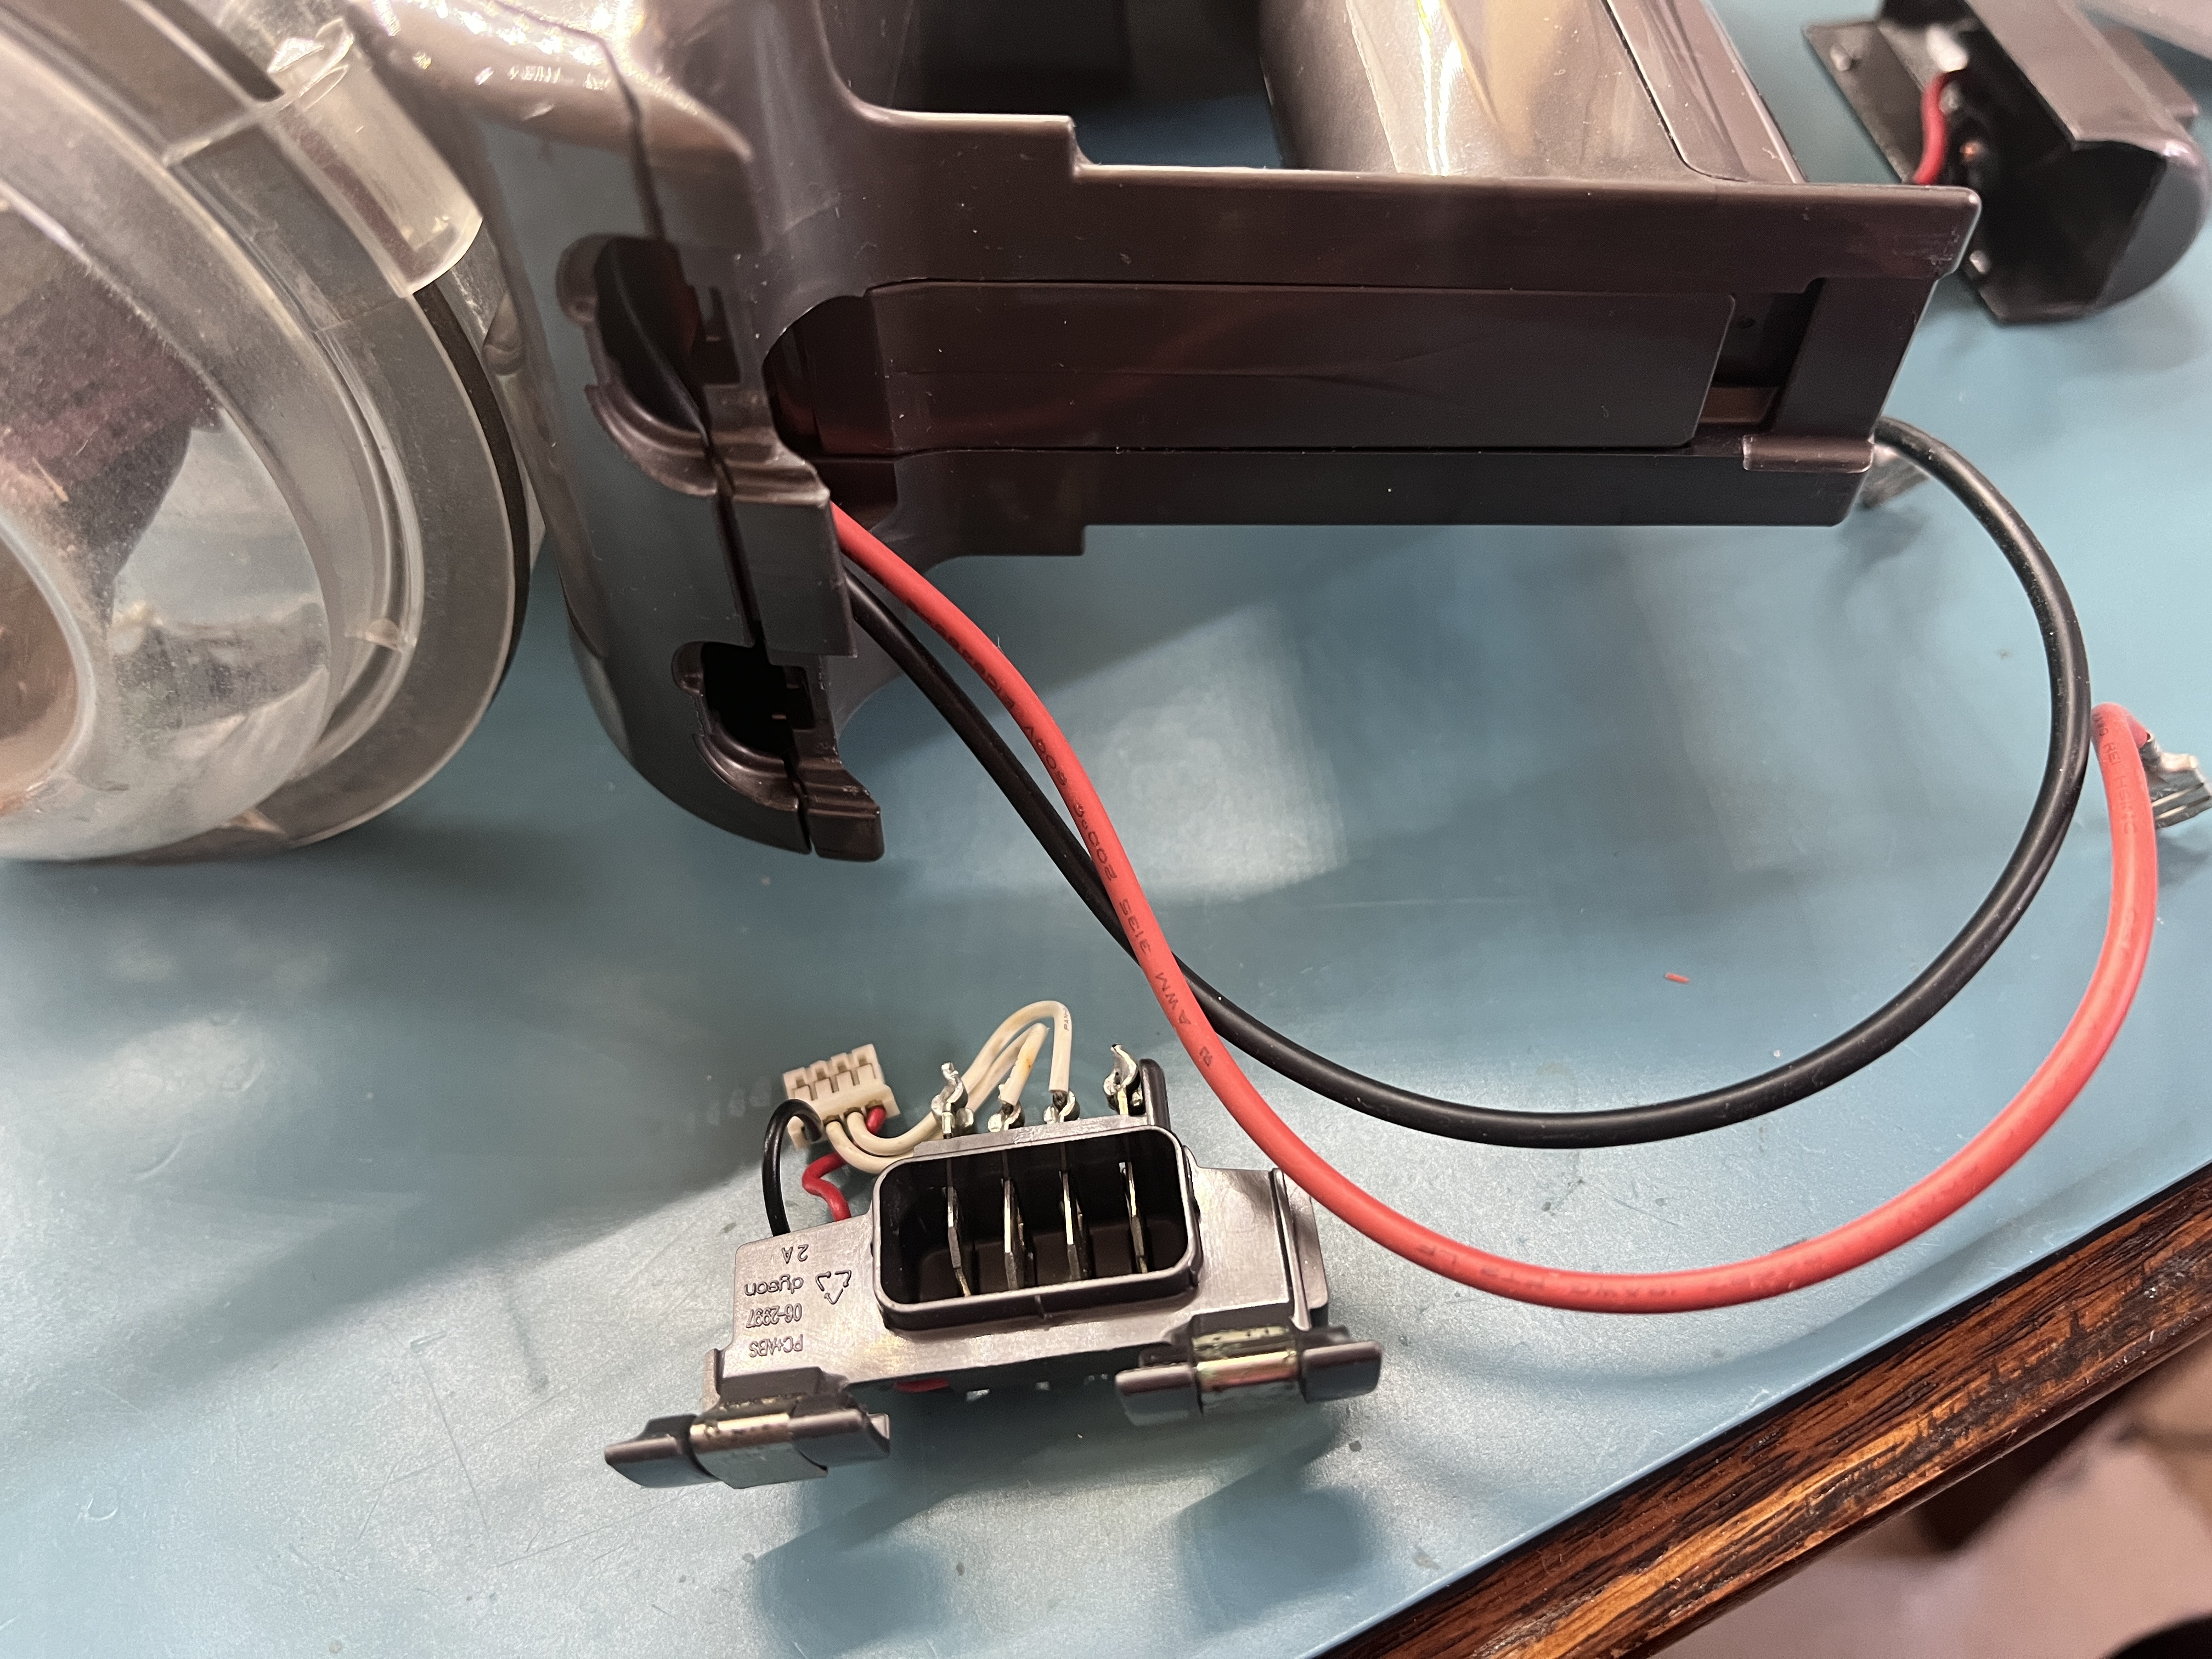
I removed the charge and battery contact assembly from the vacuum, which gives me a clear aperture to pass the power wires through, and also allows the 3D printed adapter to be more rigidly attached to the vacuum. I de-soldered the two power leads from the battery contact assembly, being very careful not to overheat the plastic and damage the assembly. I then extended the battery wires with a bit of 16AWG high-flex wire.
All of these modifications to the vacuum are easily reversible (reinstall the battery contact assembly, swap R13 back to its original value, remove the thermistor mockup resistor), so this whole adventure is low risk to the health and value of the vacuum.
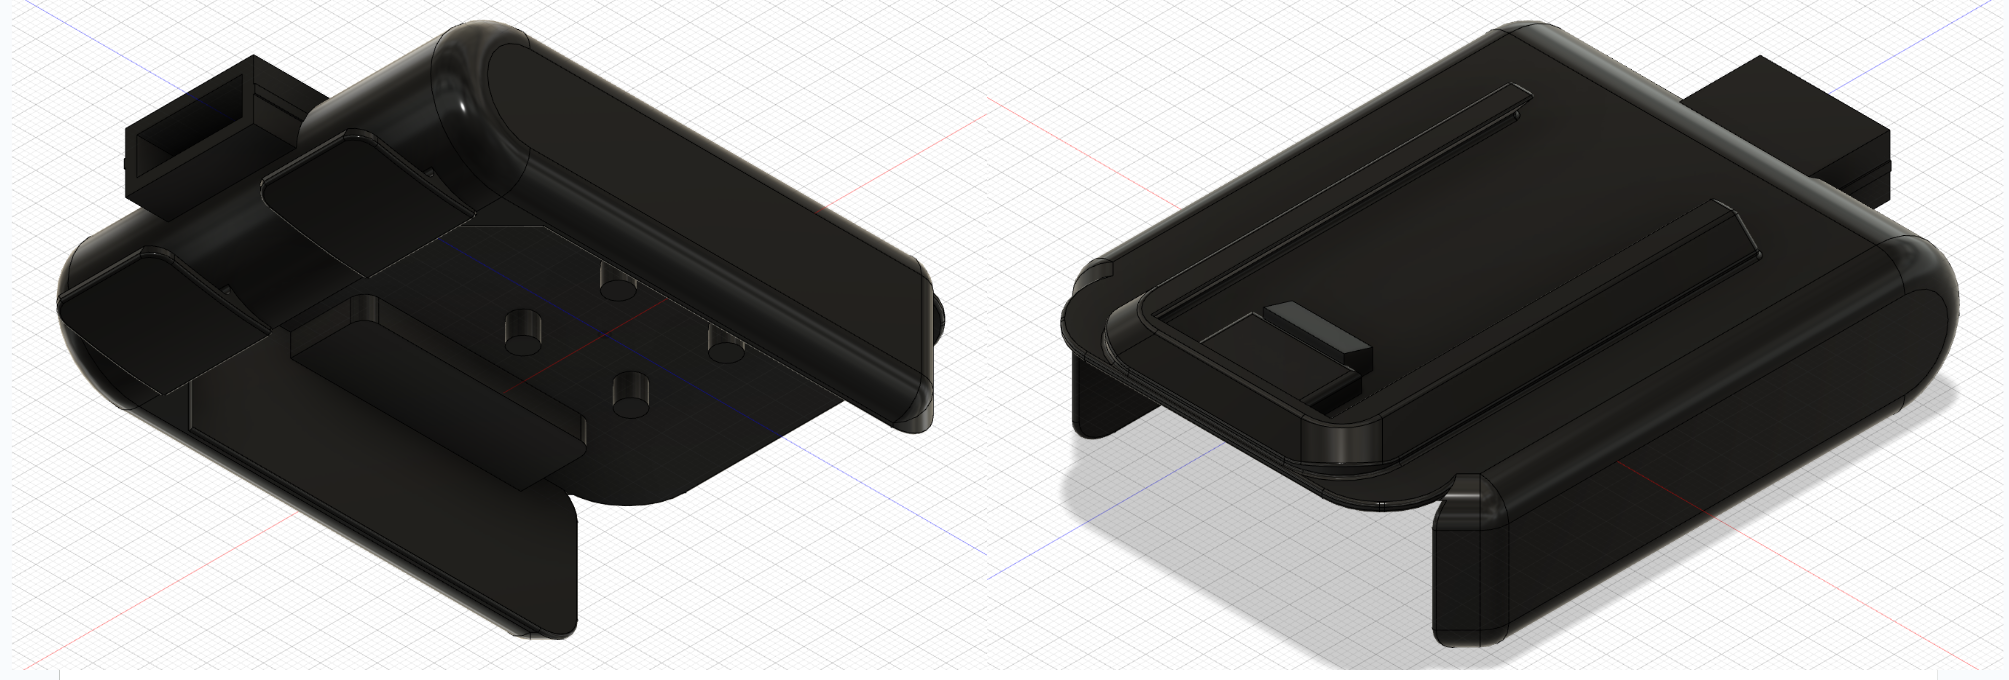
3D Printed Adapter
I whipped up a 3D printed part to adapt the Milwaukee battery cradle to the dovetail battery slide on the bottom of the Dyson. I wanted to keep the 3D printed part as short as possible in the vertical dimension, so I didn’t want to use screws to attach the 3D printed part to the battery cradle. Instead, I included some 4mm tall posts in the 3D printed part that pass through the six screw holes in the battery cradle. Once assembled, I melted the posts down with a soldering iron to rivet the two parts together.
The Finished Product
I’m extremely pleased with how well this modification worked. The vacuum cleaner runs great and has plenty of power even running on the lower voltage 5 cell battery. It is a bit heavier with the Milwaukee battery (particularly if I use one of the larger XC6.0 high capacity batteries), but it remains well balanced and feels great to use.
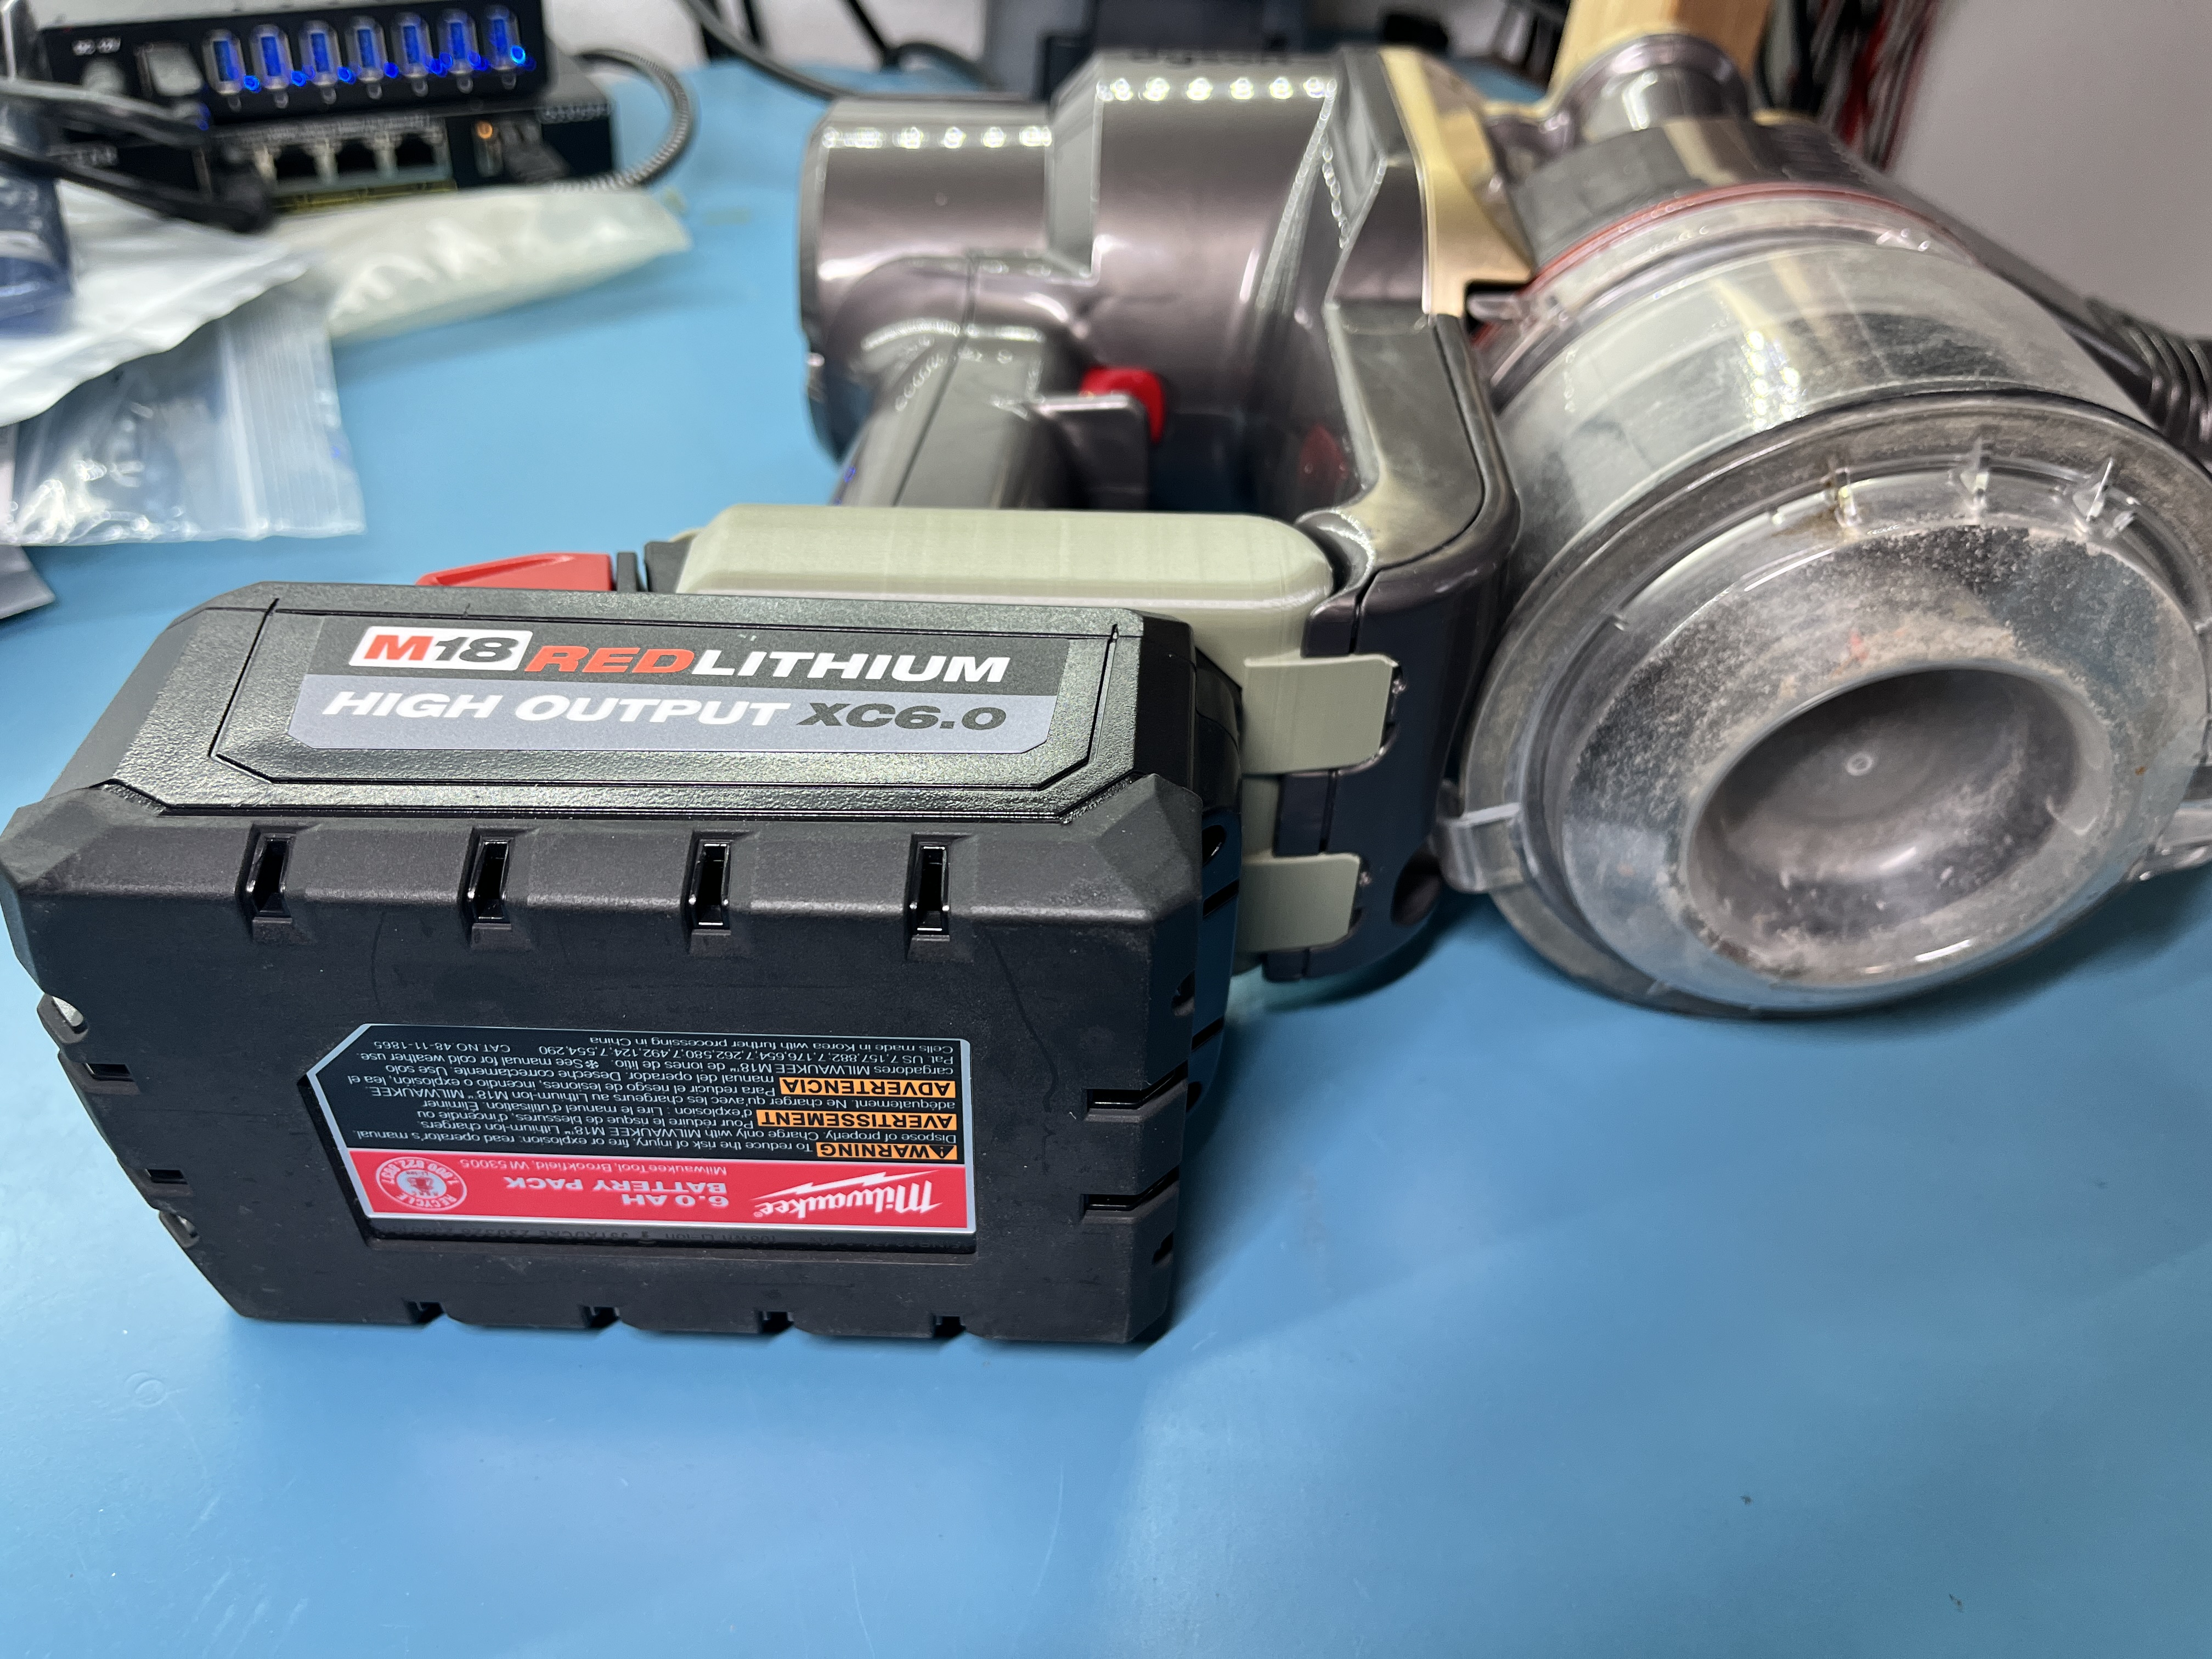
The Milwaukee battery is very easy to install and remove, and feels very securely attached to the vacuum. I was concerned that it would be a bit loosey goosey since it is a lot heavier than the Dyson battery, but I managed to get the 3D printed adapter dimensions all to the point where it is a pretty rigid assembly.
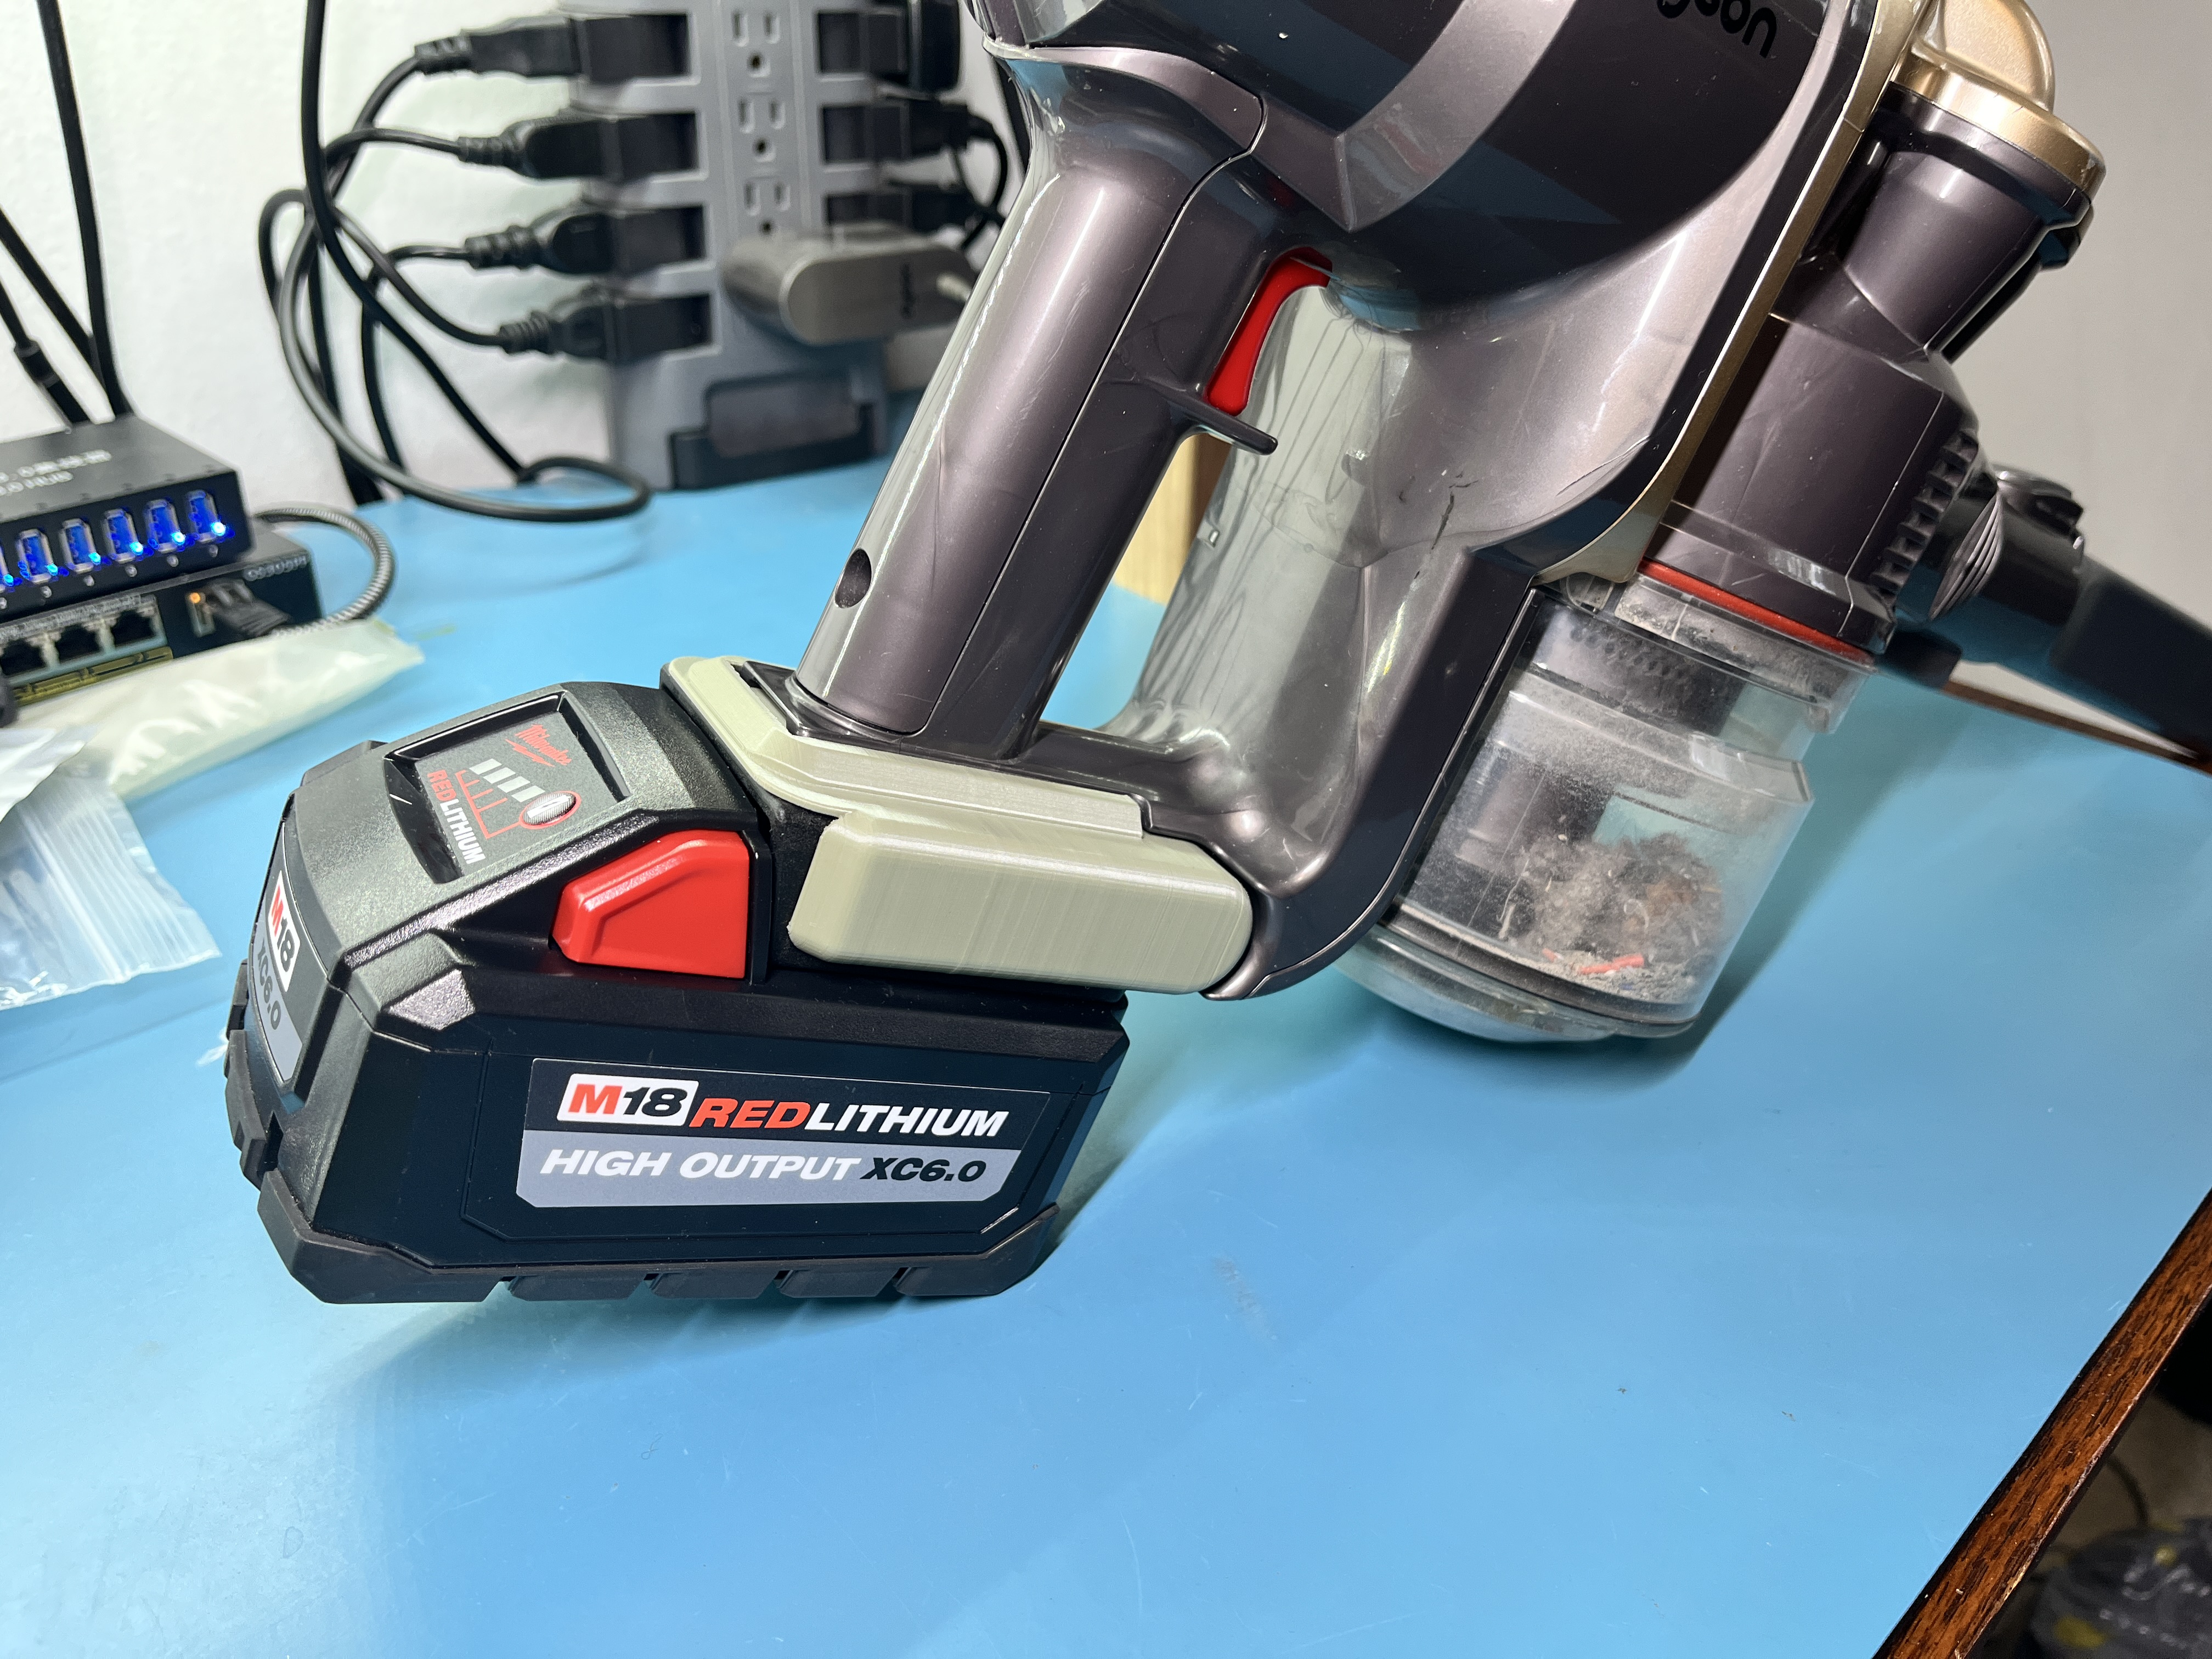
One minor annoyance is that the vacuum now doesn’t sit well on a flat surface. I had contemplated flipping the orientation of the battery so that it sits more under the body of the vacuum, but then the 3D printed adapter would have had to be around 25mm taller to allow the battery to slide on and off. I think I like this implementation better, even if it causes the vacuum to sit at a goofy angle.
If you want to do this yourself, just follow this set of steps:
- Buy one of the injection molded M18 battery cradles (Ebay link)
- Print the battery adapter (on Printables or Github .step .stl)
- Tear down your vacuum, remove the battery contact assembly, extend the battery power wires, and terminate with 6.3mm spade terminals
- Modify the vacuum controller board, swapping R13 for a 2.7kΩ 0603 resistor, and adding a 10kΩ resistor across the terminals of the battery thermistor input
- Reassemble the vacuum, assemble the battery cradle to the 3D printed adapter, plug in the power wires
- Bask in the beauty of a Milwaukee-powered Dyson!
Leave a comment