GTI Subwoofer Install
I've been a wannabe car audio nut for quite a while, but I've never really had the time, money, and inspiration to actually do anything until recently. When I had my Miata, I had planned on installing an 8" sub in the trunk in a custom fiberglass enclosure. I even went so far as to build up a foam mockup of it, but that mockup just sat on my shelf for four years of college and never got built.
Now that I'm working and have more dollars than sense and finally have a car that's big enough to hold a decent audio setup, I finally decided to buckle down and install a woofer. Following is a writeup of my install. I bought my GTI back in May 2009, and I've been pretty happy with the stock sound system except for the lack of bass. If I turned up the bass control knob at all, it would just distort and sound horrible. Otherwise, the stock system was pretty clean and loud however. I haven't been really impressed with any of the aftermarket head unit installs I've seen in GTI's, so I decided to keep the stock head unit and the stock speakers, at least for the time being. After surfing the forums and discussing it with some audio-nut friends, I decided a single 8" or 10" sub would likely do for my needs.
Because the stock system maxes out at about 20W per channel, I figured I should take it pretty easy with the wattage I put in for my woofer, so as not to overpower the stock system and end up with nothing more than a deafening back massager. After shopping around a little and reading amp reviews, I settled on a JL 250.1 mono amp. I had been wanting to mount the amplifier under my drivers seat since there's a nice little cutout there, and as it turns out this JL amp is an absolutely perfect fit for the space.
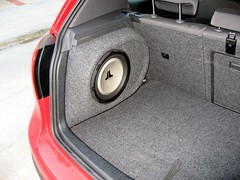
Having selected the amp, I started hunting for subs and enclosures. I contemplated making my own MDF enclosure to fit toward the side of the trunk, but I ran across a beautiful fiberglass enclosure from Audio Integrations that tucks back into one of the wheel well cubbies in the trunk. I decided to buy a JL sub just to keep my components from the same manufacturer, for no better reason than that I knew JL made good components and my OCD likes having everything uniform. I grabbed a JL 10W1V2 subwoofer, since its volume requirements fit the AI box and it had good reviews.
Finally, I drew up a whole system diagram and estimated how much wire and overbraid I'd need for the install, and made sure I had all the hardware I'd need. I've always found the most frustrating thing in the world is getting partially through an install and finding that you don't have one piece of hardware to finish it up. I ordered all the stuff from Crutchfield, and sat on the edge of my chair until it arrived a week or so later.
Once I received all the components, I wired it together on my bedroom floor with a lab power supply stolen from one of my roommates, to make sure I knew how I was going to hook it up. I wired up a potentiometer with a built-in switch to the remote volume control and the remote turn-on inputs of the amplifier in place of the stock remote volume knob. The pot replaces the remote volume control, while the switch mechanism disables the remote-on line. I terminated the control lines from the pot into a short pigtail with a connector on the end, so that I could modify it or replace it down the line without modifying the other amp wiring if I need to.
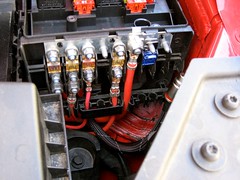
Finally, install day rolled around. My buddy James drove down from LA to assist and advise, since he's had some experience with previous audio installs. I decided to tackle routing the power cables first. I had purchased some 4AWG power wire to use for power and ground from the amp. I lucked out in that Volkswagen has a big distribution bus bar in the main fusebox under the hood with a few empty positions. This made it really easy to mount a fuse and source power for the amp.
I had to modify the front of the fuse block a little by cutting down some of the plastic below the bus bar to provide clearance for the new terminal. However, you can't see the modified bits at all when the fuse box cover is installed. In the photo above, you can see the 4AWG wire in black overbraid running below the front of the fuse box and the purple 60A fuse I used for the amplifier.
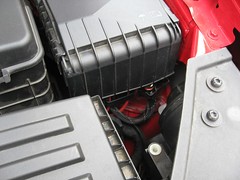
Routing the power wire through the firewall also turned out to be easier than I had anticipated. I found a large rubber boot with the main engine harness running through it just behind the battery box. This boot had a number of small "nipples" on it for additional harnesses to run through, so I clipped off one of the spare nipples and fed the power wire through from the passenger compartment. The rubber boot forms a very tight seal against the cable insulation, so I'm not concerned about water being able to migrate in from the engine compartment.
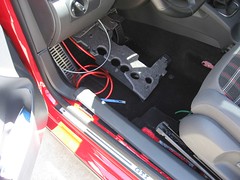
To route the power cable to the amplifier location under the seat required removing a large plastic panel under the steering wheel, several trim pieces near the door, and the drivers' seat. I had heard that disconnecting the airbag harness going to the drivers' seat can cause issues with the airbag system, so I did not completely remove the seat but rather just removed the hold-down bolts and slid it into the rear seat footwell. I removed the door sill trim piece, and the trim piece that the hood release mounts to.
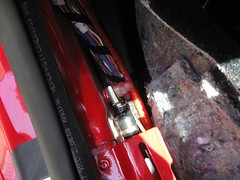
I routed the power cable down underneath the door sill and then out under the seat. There's a pretty sizable tunnel under the door sill that made routing the cable very easy. I also found a large grounding bolt in the tunnel which I decided to use for the amplifier ground. I'm not sure what the ground wire attached to the bolt goes to, but based on subsequent events (keep reading) I think it might be associated with the airbag system.
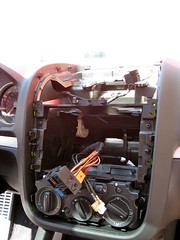
I ran the ground wire up the tunnel under the drivers' seat along with the power wire. With the power cables routed, my next step was to wire in to the back of the head unit. Following some instructions I found online, I pulled the dashboard apart, and removed the head unit. Once I had access to the head unit harness, I used some Positaps to connect a length of 8-conductor shielded 24AWG wire to the rear speaker outputs. I used four of the conductors to carry the line-level audio to the amp, two for the level control, and one for the remote-turnon, leaving one spare conductor.
After tapping the speaker outputs, I reinstalled the head unit and put the dash back together. I routed the cable from the rear of the head unit down through the center tunnel and then out under the driver's seat. I pulled out the ashtray assembly and mounted the level control pot on one of the blank switch plates next to the ESP switch. I had to cut away a decent bit of plastic from the ashtray assembly to clear the pot body, and I'm not very happy with the mounting, so I'll probably re-do it one of these days when I have some down-time.
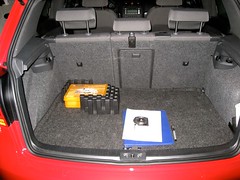
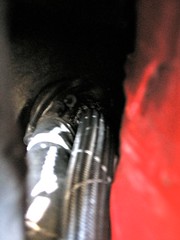
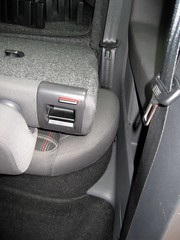
The last step before actually installing the amp was to route the wires back to the sub. This actually turned out to be substantially easier than I had feared. I was figuring I'd have to route the wires under the carpet and possibly remove the back seat to get them back to the trunk cleanly. As it turns out, however, I was able to just slide them under the plastic trim panels along the side of the car and then along the side of the rear seat. I pulled up the carpet covering the spare tire and ran the wire along the styrofoam that holds the spare in place. In this picture, you can barely see the wire in its black overbraid next to the lower rear seat bolster and right near the hinge where the seat folds down:
Finally, I installed the amp itself under the drivers' seat. This required terminating the volume control wires in a 3.5mm audio plug, splicing the speaker level inputs to the JL-supplied connector pigtail, and connecting the remote turn-on wire to the remote input on the amp. I connected the 4AWG power wires as well as the sub outputs.
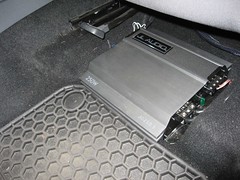
I was pretty squeamish about drilling holes in the floor to attach the amp, so I decided to go with the tried and true velcro mounting method. I put some large velcro adhesive patches to the bottom of the amp, and stuck it in place on the floor. Frequent removal would probably tear up the carpet pretty badly, but I don't anticipate I'll be pulling the amp out frequently. Here's the final amp install:
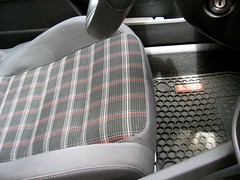
The amp is completely stealth when the driver's seat is in a normal driving position. It can only be seen if you're really looking for it:
The sub box install was ridiculously easy. Audio Integrations makes a really well-built product that just dropped right in. The only hitch I ran into was getting the installation bolts to slide cleanly into the enclosure, so I dropped a 1/4" drill bit into the installation holes to smooth and widen them out a little. The final installation is really clean, and almost looks stock because Audio Integrations did a really good job of matching the OEM carpet:
I'm really pleased with the install... I think the 10" sub is a perfect fit for the stock stereo. With the amp volume control set about halfway, the system sounds pretty well balanced. If I want to really shake and do some hearing damage, I can turn it up all the way and get all the mirrors shaking. I've got a few outstanding issues with the install that I need to fix:
- The airbag warning light came on right after the install, along with a MFD warning saying "Airbag Fault". I've read mixed stories on the forums about this issue. Some people have reported the same issue from just disconnecting the battery, but other people have said it's an indication of some larger problem. I'm mildly concerned that disconnecting that ground wire to install the amp ground might have caused the fault condition. I'll be taking the car in to the dealer in a week or two for the 20,000 mile service, so I guess I'll find out then what the issue is.
- The pot that I used for the level control is a linear-resistance pot. Unfortunately, it looks like the amp level control is designed for a logarithmic "audio" pot. I'm hunting around for a suitable replacement log pot, but for the time being it's usable. The effect of using a linear vs a log pot is that the useful range of the pot is compressed to one end of its rotation. Most of the volume control takes place in the first 1/4 turn of the pot. I'm still shopping around for a suitable audio pot, but one of these days I'll swap it out.
*UPDATE 6/12/2010* I brought the GTI in to the dealer, and the airbag fault code was apparently due to an unexpected open circuit on the passenger airbag warning light in the center of the dash. This was due to me disconnecting it while pulling the dash apart to get at the back of the head unit, even though I reconnected it when I was done. It might be possible to pull the dash apart without disconnecting this light, but I haven't tried it.Anyway, the dealer cleared the fault code at no cost, and now everything's back to normal.


Leave a comment